Blog
Air sealing weekend checklist: plug the worst drafts in 2 days
Calm the worst drafts in a single weekend with a DIY air sealing plan that tackles doors, attic access, outlets, and penetrations—without opening walls.
If your house has cold floors, drafty rooms, or that constant “why is the heat still running?” feeling, air leaks are usually part of the story.
You don’t need a full renovation to make progress. One focused weekend with the right materials can calm down the worst drafts and set you up for bigger upgrades later.
This checklist walks you through:
- What to tackle in a normal weekend,
- Which leaks matter most,
- What to leave for pros.
You’ll end up with a tighter, more comfortable house and a clearer idea of where your bigger energy dollars should go.
On this page
- What this checklist can and can’t do
- Before you start: safety, scope, and expectations
- Safety checklist
- Decide your scope for this weekend
- Shopping list: tools and materials that work
- Friday evening: 30 minute draft hunt
- How to do a simple draft test
- Saturday morning: doors and obvious leaks
- Exterior doors
- Windows you use often
- Saturday afternoon: attic hatch and top-of-house leaks
- Attic hatch or pull-down stairs
- Simple attic penetrations you can reach
- Sunday morning: baseboards, outlets, and small leaks
- Baseboards and trim on exterior walls
- Outlets and switches on exterior walls
- Sunday afternoon: basement, crawlspace, and mechanical penetrations
- Rim joists and sill plates
- Plumbing and mechanical penetrations
- What to leave for pros, even on a “DIY” weekend
- How to check if your weekend made a difference
- Quick FAQ
What this checklist can and can’t do
This weekend plan is built for a homeowner who:
- Has basic DIY skills and simple tools,
- Can safely use a ladder and a caulk gun,
- Wants to reduce drafts and energy waste without opening walls.
You’ll focus on:
- Gaps you can see and reach,
- Places where conditioned air leaks straight outside or into an unconditioned attic,
- Sealing around the “Swiss cheese” of your house; doors, trim, outlets, and mechanical penetrations.
You won’t:
- Dense pack walls,
- Rebuild your roof,
- Replace major equipment.
Those larger projects still matter; this weekend work gives you immediate comfort gains and better data for when you plan bigger upgrades.
Before you start: safety, scope, and expectations
Safety checklist
Before you touch sealant or foam, check:
-
Combustion appliances
If you have a gas furnace, boiler, water heater, or gas dryer, make sure vents and flues are in good shape. Do not seal or block any vent or fresh air intake. If you smell gas or see scorch marks, pause and call a pro. -
Attic and crawlspace access
Only go into spaces that feel structurally sound. If you see loose wires, unknown insulation that looks dusty and gray, or standing water, step back and get advice first. -
Fire safety
Around chimneys, flues, and recessed lights, you need rated materials and clearances. When in doubt, leave a gap around hot surfaces and use high temperature caulk where appropriate.
Decide your scope for this weekend
Pick your focus before you walk around:
- Option 1: “Stop the worst drafts on the main floor.”
- Option 2: “Seal the attic hatch and obvious penetrations into the attic.”
- Option 3: “Focus on outlets, switches, and baseboards on exterior walls.”
Trying to tackle everything at once leads to half finished work and frustration. One clear focus wins.
Shopping list: tools and materials that work
You don’t need specialty gear. For a typical weekend, aim for:
Tools
- Caulk gun,
- Utility knife with fresh blades,
- Putty knife or flexible scraper,
- Tape measure,
- Step ladder,
- Rags and a spray cleaner,
- Flashlight or headlamp.
Materials
- Exterior grade caulk for outdoor gaps; paintable acrylic latex with silicone works well for most trim and siding joints.
- Interior paintable caulk for trim, baseboards, and interior joints.
- Low expansion spray foam for small to medium gaps around pipes, wires, and framing.
- High temperature caulk rated for flues and metal chimneys, if you plan to work near them.
- Adhesive backed weatherstripping for doors and attic hatches.
- Door sweeps for exterior doors with gaps at the bottom.
- Foam outlet and switch gaskets for walls on the outside of the house.
- A few tubes of masonry compatible sealant if you have brick or block.
Buy slightly more material than you expect to use. Leftover caulk and weatherstripping will find a home soon enough.
Friday evening: 30 minute draft hunt
Before you start sealing, figure out where air moves now. A quick walkthrough will make Saturday smoother.
How to do a simple draft test
Pick a cool or windy evening and walk your house with:
- A stick of incense,
- Or a thin strip of toilet paper,
- Or the back of your hand.
Pause at:
- Exterior doors and the floor near them,
- Window frames, especially older ones,
- Outlets and switches on exterior walls,
- Baseboards on exterior walls,
- The attic hatch or pull down stairs,
- Around plumbing penetrations under sinks,
- Around where pipes and wires pass through floors or ceilings in closets, basements, or utility rooms.
Watch or feel for:
- Smoke drifting sideways,
- Paper fluttering,
- Cold air on your hand.
Note the worst offenders in each room. You can jot them down or put blue painter’s tape on areas you want to seal.
This walkthrough also shows you where not to work; anywhere close to flues, complex wiring, or unknown materials should move to your “ask a pro” list.
Saturday morning: doors and obvious leaks
Start with leaks you notice every day. These are easy wins and offer a quick confidence boost.
Exterior doors
-
Check weatherstripping
Close the door and look for light around the edges. Slide a dollar bill between the door and the frame. If it moves freely with the door shut, the seal is weak.- Replace worn or cracked weatherstripping.
- Adjust strike plates and hinges so the door closes snugly without forcing the latch.
-
Seal the bottom gap
If you see daylight under the door or feel a strong draft at the threshold:- Install or adjust a door sweep.
- Make sure it lightly brushes the threshold; you want contact but not binding.
-
Caulk the trim and frame outside
On a dry day, run a bead of exterior caulk along gaps where the door trim meets siding and where the trim meets the door frame. Smooth it with a finger or tool for a clean seal.
Windows you use often
If full window replacement is not in the cards, tighten what you have.
- Caulk gaps between window trim and wall inside, and between exterior trim and siding outside.
- If you have older single pane windows, consider temporary clear film kits on the worst drafty ones for the heating season.
- Make sure locks engage fully; a locked window usually seals tighter than an unlocked one.
Avoid sealing the operable joints that you need to move the window. Stick to the frame where it meets the wall and trim.
Saturday afternoon: attic hatch and top-of-house leaks
Warm air rises, so leaks at the top of your house often waste the most energy. Even without a full attic project, you can often improve the hatch or pull down stairs in a weekend.
Attic hatch or pull-down stairs
If your attic access is in a hallway or closet and feels cold in winter or hot in summer, it needs attention.
-
Weatherstrip the hatch
- Apply adhesive weatherstripping around the frame on the house side.
- Make sure the hatch compresses the weatherstripping when closed.
-
Add insulation to the hatch itself
- Attach rigid foam board to the attic side of the hatch with adhesive and screws or washers.
- Keep it light enough that you can still open the hatch safely.
-
Cover pull down stairs
For pull down stairs, build or buy an insulated box that sits over the stairs in the attic. Seal the seams of the box, and weatherstrip where it meets the attic floor.
Simple attic penetrations you can reach
If your attic is safe to enter and has decent flooring near the hatch:
- Look for gaps around plumbing stacks and electrical penetrations.
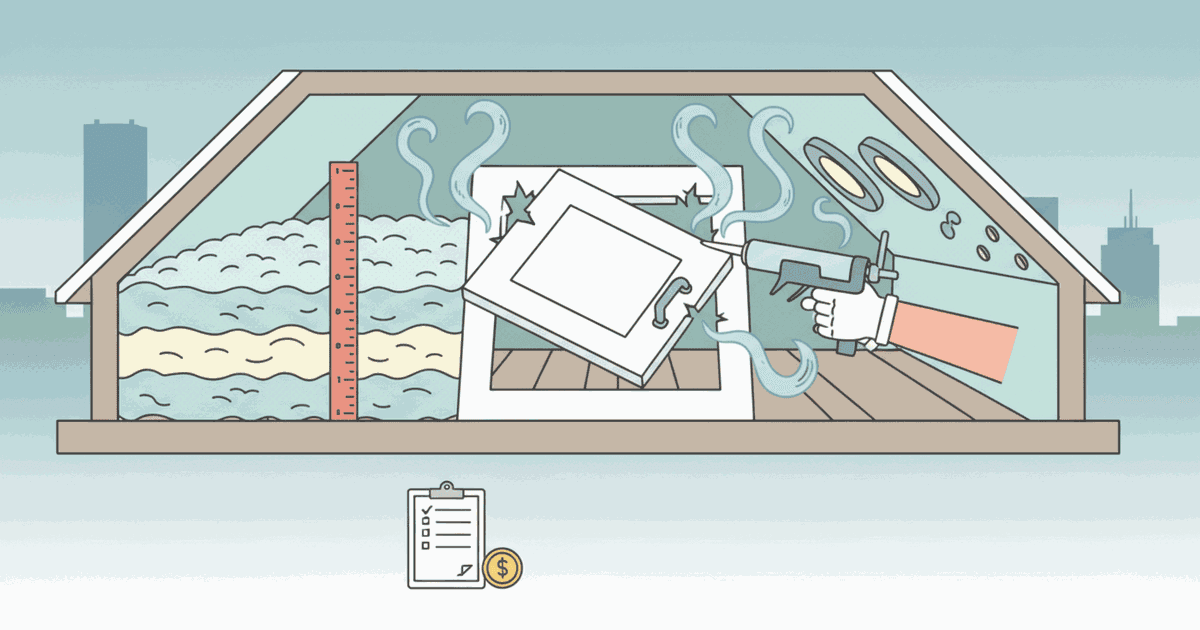
- Use low expansion spray foam for gaps up to a finger width or two.
- Keep foam away from flues, chimneys, and non-IC rated recessed lights; these need special treatment.
Do not bury knob-and-tube wiring, aluminum wiring, or recessed fixtures under insulation or foam. Those situations call for an electrician or insulation pro.
Sunday morning: baseboards, outlets, and small leaks
Now pick off the smaller leaks that add up. Focus on exterior walls first.
Baseboards and trim on exterior walls
- Run a small bead of paintable interior caulk along gaps where baseboards meet walls and where window and door trim meet walls.
- Smooth with a damp finger or tool.
- Wipe stray caulk before it skins over.
This reduces drafts that sneak in from wall cavities and makes future painting easier.
Outlets and switches on exterior walls
Take one room at a time.
- Turn off the breaker if you’re not comfortable working around live boxes.
- Remove the cover plates for outlets and switches on exterior walls.
- Press foam gaskets over the box, then reinstall the cover plate.
- If you feel cold air blowing through a box, you can also seal small gaps between the box and drywall with a tiny line of caulk, staying clear of wires.
These small upgrades matter most in older houses where insulation is patchy or the wall cavities connect to attics and crawlspaces.
Sunday afternoon: basement, crawlspace, and mechanical penetrations
If you have time and safe access, finish your weekend in the lowest parts of the house.
Rim joists and sill plates
In unfinished basements or crawlspaces:
- Look where the foundation meets the wood framing on top.
- Seal visible gaps between the concrete or block and the wood sill with appropriate caulk or foam.
- Seal around any visible pipe or wire that passes through the band joist to the outside.
This slows cold air from slipping in at floor level and can improve comfort on the story above.
Plumbing and mechanical penetrations
Check under sinks, near hose bibs, and where furnace or water heater lines exit the house.
- For pipes passing through wood or drywall, use low expansion foam or caulk to close the gap.
- For penetrations through masonry, use a masonry compatible sealant outside.
Do not seal any pressure relief valves, drains, or combustion air inlets.
What to leave for pros, even on a “DIY” weekend
A good rule: if you are guessing about safety, stop.
Move these to your pro list:
- Knob-and-tube or suspect wiring in attics and walls.
- Complex duct sealing inside chases or tight spaces.
- Sealing around metal flues, masonry chimneys, or high temperature vents.
- Any area with signs of moisture damage, mold, or structural issues.
Your weekend work still helps those pros. When you later get an energy audit or insulation quote, you already understand where air moves and you can show what you have addressed.
How to check if your weekend made a difference
You should feel some changes right away, especially near doors, outlets, and the attic access. To measure progress more objectively:
- On the next windy day, repeat your incense or paper test in the spots you sealed.
- Pay attention to comfort; are certain rooms less drafty, are floors warmer, does the thermostat cycle less often.
- Track thermostat settings; if you keep the house at the same temperature but feel more comfortable, you gained ground.
For a deeper check, pair this with a bill breakdown or energy use tracking tool. Enter your pre-work bills as a baseline, then compare the next season’s usage with weather adjustments later. The numbers will be noisy for small projects, but trends over time help shape your bigger upgrade plan.
Quick FAQ
Do I need a blower door test before air sealing weekend work?
It helps, but you can still fix obvious leaks without it. A blower door test before and after major sealing and insulation work is ideal. For a weekend project, your eyes, hands, and simple draft tests are enough to start.
Can I use spray foam everywhere I see a gap?
No. Use low expansion foam only where you can see and control it, away from flues, hot surfaces, and complex wiring. Around high temperature areas or where local code has clearances, use rated materials and leave difficult sections for pros.
Will this weekend save a big share of my bill on its own?
Likely not, and that’s fine. Think of this as stage one; you reduce glaring leaks, gain comfort, and learn your house. When you later plan bigger projects like full attic air sealing, dense pack, or new HVAC, those upgrades stack on top of the work you did here.
What should I do next after this checklist?
Use what you learned to update your home energy plan. If your attic hatch and rim joists were terrible, you now know a full shell and attic project belongs near the top of your upgrade list. If your basement and doors were in good shape but you still feel cold, that points more toward insulation depth, ductwork, or equipment.
You do not have to fix everything in one season. A focused weekend on air sealing moves your home in the right direction and puts real experience behind your next set of decisions.
Get practical energy tips
Join homeowners getting practical tips on cutting energy bills and staying comfortable.
Practical tips only. Unsubscribe anytime.
Read this next
Related guides selected by topic overlap and upgrade path.
What attic air sealing and blown-in insulation cost in Boston in 2026, how to read a quote, plus Mass Save rebates and the 0% HEAT Loan. Sanity-check pricing before you sign.

Attic insulation costs about $1,500 to $3,500 for a typical home, or $1.50 to $4 per sq ft. See 2026 prices by material, attic size, and tax credit.

A practical breakdown of garage door insulation costs: DIY kits vs retrofits vs a new insulated door, what actually improves comfort, and a checklist to compare options.

Attic air sealing cost in 2026: $350–$1,200 for a typical pro job, $50–$300 for DIY materials. What's included, why you seal before insulating, and how to compare quotes.