Blog
How to plan home energy upgrades without wasting money
Step-by-step plan to prioritize weatherization, right-sized HVAC, water heating, and solar so you avoid expensive missteps.
You only get so many chances to spend thousands of dollars on your house. Blow that money on the wrong upgrade and you live with the mistake for years.
A neighbor of mine learned this the hard way. He bought a heat pump first, before anyone touched his air sealing or insulation. The new system was efficient and quiet. His back bedroom was still cold every January. The equipment was sized for a leaky house, and no amount of efficiency fixed the drafts feeding that room. He spent the money in the wrong order.
I ran efficiency programs for a utility before starting this site, and that story is common. So now I insist on two things before anyone buys big equipment: a real breakdown of where the energy bill goes, and an audit of where the house leaks. The spreadsheet I built to keep my own drafty 1920s Minneapolis duplex on track eventually became the My Plan tool. My rule is simple: fix the order, not just the list.
By the time you finish this guide, you will know which upgrades usually give the strongest long-term value, what order to do them in for a typical home, and how to pressure test your plan with simple math so you do not get swept along by sales pitches. The tools below follow that same order, so you can move from "where does my money go?" to "what do I do next year?" without guesswork.
On this page
- The decision sequence, top to bottom
- Start with your goals, not with products
- Step 1: collect a few key numbers
- Step 2: find where energy leaves your home
- Step 3: decide on a budget and a timeline
- Step 4: choose an upgrade order that fits your home
- 4.1 low cost fixes and controls
- 4.2 air sealing and insulation
- 4.3 right sized heating and cooling
- 4.4 water heating and other loads
- 4.5 check your electrical capacity
- 4.6 solar and batteries as the last layer
- Step 5: pressure test your plan with simple math
- Step 6: avoid common money traps
- Chasing rebates instead of value
- Replacing windows too early
- Oversizing new HVAC
- Buying isolated gadgets with no plan
- When to call in pros, and how to use them well
- Your tools, mapped to the plan
The decision sequence, top to bottom
Here is the spine of the whole plan. Each step lowers the cost or the risk of the step after it. The links point to the tool or guide that does the work for that step.
- Understand your bill. Split last year's cost into heating, cooling, water heating, and everything else with the bill breakdown tool, or read the line items by hand with how to read your utility bill. You cannot fix the biggest problem until you know which one it is.
- Audit and diagnose. Book a home energy audit so a blower door test shows where air actually leaks. This is the step my neighbor skipped. If money is tight, see which audit programs your utility subsidizes first.
- Air seal and insulate. This is the highest-leverage first project for most older homes. Start with the insulation upgrade hub for sequencing, then size the payback with the insulation ROI calculator.
- Right-size the mechanicals. Once the shell is tighter, plan heating and cooling. Compare options on the heating and cooling hub, weigh the heat pump versus furnace in winter question for cold climates, and estimate cost and savings with the heat pump calculator. Plan water heating in the same window using the water heating hub and the water heater comparison tool.
- Check electrical capacity. Before or alongside electrification, confirm your panel can handle the new loads. The electrification hub covers load calculations, and if you do need more service, the 100-amp to 200-amp upgrade cost guide shows what that runs.
- Add solar and storage last. With usage low and the heating plan set, size an array for a realistic future load. Start at the solar hub and the upgrade timing tool to slot it into the right year.
The rest of this guide walks each step in detail, with the math to back it up.
Start with your goals, not with products
Before you touch a quote or a rebate page, write down what you care about most for the next 5 to 10 years.
Common goals:
- Cut monthly bills by a clear target, for example 20 percent.
- Fix comfort problems, for example cold bedrooms, hot upstairs, or drafty living rooms.
- Replace aging equipment before it fails on a holiday weekend.
- Reduce the home’s emissions while still making financial sense.
- Improve resale value and future proof the home for tougher codes and buyers.
Pick your top two. When you compare upgrades later, you will choose based on how well they move those two goals, not on what is newest or most heavily subsidized.
If you would rather not pick blind, the guided start here page sorts you by what you are trying to solve. There are three common entry points, and each one routes you to a different first step:
- Start with high bills if the monthly number is the thing keeping you up at night.
- Start with comfort if the real problem is a cold bedroom, a hot upstairs, or drafts you can feel.
- Start with equipment if your furnace, AC, or water heater is old and you are bracing for a failure.
Step 1: collect a few key numbers
You do not need a degree, but you do need a few facts.
Grab:
- Last 12 months of utility bills, gas and electric.
- House size in square feet, rough year built, and number of stories.
- Main heating fuel; gas, oil, or electricity.
- Main cooling; central AC, window units, or none.
- Any known problems; ice dams, moisture, uneven rooms, short cycling, breakers tripping.
If you can, schedule a home energy audit. The U.S. Department of Energy and utilities report that following an audit’s recommendations often cuts energy use by about 5 to 30 percent, depending on the house and how many upgrades you finish. Before you book one, the home energy audit cost guide explains what you should pay, what a blower door test reveals, and when a utility will cover most of the price.
That range is wide, which is the point. An audit helps you see where your home sits along that range so you do not guess. To turn those 12 months of bills into a usable picture, run them through the bill breakdown tool. It splits your spending into heating, cooling, water heating, and other loads, which tells you which problem is actually worth the most money to fix.
Step 2: find where energy leaves your home
Most older homes waste energy through the shell; the attic, walls, floors, and air leaks. Insulation and air sealing are boring compared to a shiny heat pump or solar array, but they often decide how large and how expensive those later systems need to be.
Energy Star and the EPA estimate that air sealing plus added insulation in key areas can trim around 15 percent of heating and cooling costs, or about 11 percent of total household energy costs in a typical home.
Insulation contractors and independent studies usually show payback periods for insulation upgrades between 2 and 10 years, often 3 to 7 years in many U.S. markets, with annual returns on investment in the 5 to 15 percent range.
That is stock market level return in some cases, except you also gain comfort and quieter rooms.
Focus first on:
- Attic insulation and air sealing around lights, hatches, and chases.
- Big leaks in rim joists, sill plates, and around vent penetrations.
- Obvious gaps around doors, old weatherstripping, and window frames.
Weatherization programs that combine these measures often see heating energy use drop around 10 to 18 percent.
If your house has never had serious air sealing or insulation upgrades, this is your first major project in almost every planning scenario. The insulation upgrade hub walks the air-seal-first sequence in more depth, and the insulation ROI calculator lets you plug in your own square footage and rates to see the payback before you call a contractor.
Step 3: decide on a budget and a timeline
Now set some guardrails.
Pick:
- A rough budget for the next 12 months.
- A bigger range for the next 3 to 5 years.
Examples:
- Up to 2,000 dollars in the next year; you focus on an audit, targeted air sealing, basic attic work, and controls.
- 5,000 to 8,000 dollars in the next year; you can do significant insulation plus either a water heater or partial HVAC upgrade.
- 10,000 to 20,000 dollars across several years; you phase in insulation, a new heating and cooling system, and possibly solar once the shell is tight.
You will rarely do everything in one shot. Good plans stack projects so each one supports the next. Insulation first keeps future heating and cooling equipment smaller, which lowers both upfront cost and operating cost.
Step 4: choose an upgrade order that fits your home
Here is a sequence that works well for many houses. You will adjust based on climate, fuel prices, and how broken your current systems are.
4.1 low cost fixes and controls
These changes are not the headline upgrades, but they give quick wins and buy you time.
- Smart thermostat or better scheduling on your current thermostat.
- Sealing simple air leaks around doors and windows.
- Sealing accessible ducts in basements and attics.
- Adjusting water heater temperature and insulating accessible hot water pipes.
The U.S. Department of Energy notes that turning down the thermostat by 10 to 15 degrees for 8 hours per day can save around 10 percent per year on heating and cooling. Before you buy a smart thermostat, run your setback through the thermostat savings calculator so you know whether the savings justify the device for your schedule and climate.
Bundle this step with a walkthrough or audit so you do not waste money on gadgets that do not match your house.
4.2 air sealing and insulation
Next, address the shell in a structured way:
- Attic air sealing and insulation to recommended R values for your climate.
- Sealing and insulating accessible rim joists and basement band joists.
- Adding insulation to crawlspaces or knee walls if they exist.
Energy Star cites average savings around 15 percent on heating and cooling costs from air sealing and added insulation in target areas.
If money is tight, an audit can tell you which combination of attic work and air sealing gives the most impact per dollar in your specific house.
4.3 right sized heating and cooling
Once the shell is in better shape, your heating and cooling plan becomes clearer.
Questions to answer:
- How old is your furnace, boiler, or main heating system?
- How often does it need repair?
- Are you in a region where heat pumps perform well on both comfort and cost given local electricity and gas prices?
Heat pumps move heat instead of generating it, so they can provide the same comfort with less energy input than resistance electric or older gas systems.
But high electricity prices in some regions mean that operating costs do not always drop compared with gas, even with higher efficiency, so you need local numbers, not national averages. The heating and cooling hub lays out how to weigh these options, and if you are in a cold climate the heat pump versus furnace in winter guide covers low-temperature performance, backup heat, and dual-fuel setups. When you are ready for real numbers, the heat pump calculator estimates installed cost and annual operating cost against your current system using your own rates.
A practical note on incentives: the federal 25C heat pump tax credit ended for 2026 installs, so do not build your plan around it. The heat pump tax credit guide explains exactly what changed, how to claim it if your install happened in 2025, and which state and utility rebates still help.
If your current system still works reliably, your plan might say:
- Insulation and air sealing now.
- Replace the furnace or add a heat pump in 3 to 5 years, sized for the tighter house.
If the system is failing now, you might:
- Do as much air sealing and attic work as budget and time allow.
- Choose a heating solution that fits the tighter house you plan to have, not the leaky one you started with.
4.4 water heating and other loads
Water heating often uses around 15 percent of a home’s energy.
Common upgrades:
- Heat pump water heater in a suitable space.
- High efficiency gas water heater where gas remains cheap.
- Pipe insulation and low flow fixtures where a full replacement is not yet needed.
Heat pump water heaters in some studies show annual bill savings in the low hundreds of dollars with payback periods around 4 years, especially when incentives help with upfront cost. The water heating hub covers sizing and placement, and the water heater comparison tool puts tank, tankless, and heat pump options side by side on cost and savings for your home.
Include this in your 3 to 5 year plan, not as an impulse add on.
4.5 check your electrical capacity
If your plan includes a heat pump, a heat pump water heater, or an EV charger, the panel becomes part of the conversation. Adding several large electric loads can push an older service past its safe limit.
The good news is that a panel upgrade is not automatic. Many homes electrify without touching the main panel, helped by a load calculation, smart equipment choices, and circuit-sharing devices. The electrification hub explains how to plan the loads and when a service upgrade is actually required.
If a licensed electrician's load calculation says you do need more service, budget for it deliberately rather than as a surprise on install day. The 100-amp to 200-amp upgrade cost guide shows what that job typically runs and what drives the price, so you can fold it into the right year of your plan.
4.6 solar and batteries as the last layer
Solar and batteries work best once you have lowered the home’s energy use and clarified your long term heating plan. That way you size the array for a realistic future load.
Solar economics depend heavily on:
- Local electricity rates.
- Net metering rules or export rates.
- Upfront cost after tax credits and rebates.
- Roof age and shading.
Analyses on typical homes show payback ranges from under 10 years in good markets to several decades in poor ones, even with tax credits, so the math must match your roof and tariff, not a generic national average.
Solar can still make sense for resilience or long term hedging even when the simple bill payback is longer, but you should list those reasons clearly so you know you are paying for more than pure savings. The solar upgrade hub covers how to decide when panels and batteries pay off, and the upgrade timing tool helps you slot solar into the right year relative to your other projects so capital does not collide. Windows tend to sit in the same "later, and for comfort more than payback" category; the windows upgrade hub compares replacement against cheaper air-sealing fixes.
Step 5: pressure test your plan with simple math
Now you have:
- Goals.
- A sense of where the house wastes energy.
- A budget range.
- An upgrade order.
Tie it together with a few checks.
Use:
- The bill breakdown tool to split last year’s costs into heating, cooling, water heating, and other loads, so the biggest line item gets your first dollars.
- The My Plan tool to track cost, estimated savings, payback, and target year for each planned upgrade in one place. This is the planner that grew out of my own spreadsheet.
For each project, list:
- Upfront cost after any incentives.
- Estimated annual savings.
- Payback period; cost divided by savings.
- Your confidence level in the estimate; low, medium, or high.
Example for attic insulation and air sealing:
- Current heating and cooling costs: 1,800 dollars per year.
- Savings assumption: 15 percent, based on Energy Star and similar projects; that equals 270 dollars per year.
- Project cost after incentive: 3,000 dollars.
- Payback: 3,000 / 270 ≈ 11 years.
Now compare that to a different project, for example a heat pump water heater:
- Water heating costs: 500 dollars per year.
- Savings assumption: 50 percent, from regional data and manufacturer ranges; 250 dollars per year.
- Project cost after incentive: 1,000 dollars.
- Payback: 1,000 / 250 = 4 years.
If your goal is faster payback on limited funds, you might move the water heater earlier. If your goal is comfort and future HVAC downsizing, you might keep insulation first even with slower pure payback. Either way, you decided with numbers and a stated reason behind every choice.
Step 6: avoid common money traps
Plenty of people start with good intentions and still waste money. Watch for these patterns in your plan and in contractor pitches.
Chasing rebates instead of value
Rebates help, but they do not turn a poor fit into a strong project. A 2,000 dollar discount on a 12,000 dollar system that saves little in your region is worse than no discount on a 3,000 dollar project that pays back in four years.
Replacing windows too early
New windows have high appeal but often long payback periods, especially if you have storm windows and can add targeted air sealing around frames. Many utility and insulation experts point to insulation and air sealing as the more cost effective early steps for most existing homes.
Keep windows in the plan for comfort, noise, and aesthetics, but do not let them crowd out higher impact shell work. The windows upgrade hub lays out when replacement is worth it and which cheaper fixes, like storm windows and air sealing around frames, usually win on payback.
Oversizing new HVAC
If you replace a furnace or install a heat pump before tightening the shell, contractors often size equipment for the leaky house. When you later add insulation and air sealing, the equipment runs short cycles, costs more upfront, and may feel less comfortable.
Ask for load calculations that assume your planned shell upgrades, not only your current conditions.
Buying isolated gadgets with no plan
Smart thermostats, smart vents, and air quality sensors can help, but only when they support a clear base plan. A home full of gadgets without weatherization and right sized equipment keeps wasting energy in slow motion.
When to call in pros, and how to use them well
Professionals can save you money or cost you money depending on how you work with them.
Good uses of professional help:
- A home energy audit before major projects, especially if incentives cut the price. The DOE notes that following audit recommendations often saves 5 to 30 percent on energy use.
- An insulation and air sealing contractor who can show before and after blower door numbers and explain their priority list.
- One or two HVAC contractors who provide clear load calculations, options, and assumptions about energy prices.
Bring your written goals and rough plan to these meetings. A contractor with a clear view of your priorities is more likely to suggest a package that fits the plan instead of whatever system they like to sell.
Your tools, mapped to the plan
Each calculator on this site answers one question in the sequence above. Use them roughly in this order, and feed the outputs into your plan as you go.
- Bill breakdown tool: splits your energy spending into heating, cooling, water heating, and other loads so you know where the money goes before you spend any.
- Insulation ROI calculator: estimates the payback on air sealing and insulation for your square footage and rates, the usual first major project.
- Heat pump calculator: compares installed cost and annual operating cost of a heat pump against your current system using local prices.
- Water heater comparison tool: puts tank, tankless, and heat pump water heaters side by side on cost and savings.
- Thermostat savings calculator: checks whether a setback schedule or smart thermostat is worth it for your climate and habits.
- Upgrade timing tool: helps you sequence projects across years so capital and incentives line up instead of colliding.
- My Plan: the planner that ties it together. Enter projects, rough costs, expected savings, and target years to build your roadmap.
If you are not sure which one to open first, the start here page asks what you are trying to solve and points you to the right tool and guide.
When you finish, you should have a one-page summary of your 5-year plan, a near-term project list for the next 12 months, and a short explanation you can share with a spouse, partner, or contractor.
That document is worth more than any single gadget. It keeps you focused when a sales pitch or new rebate tries to pull you sideways.
Sources & further reading
- Home Energy Audits and Assessments — U.S. Department of Energy
- Seal and Insulate with ENERGY STAR — ENERGY STAR
- Thermostats — U.S. Department of Energy
- Heat Pump Water Heaters — U.S. Department of Energy
- Planning for Home Renewable Energy Systems — U.S. Department of Energy
Frequently asked questions
What order should I do home energy upgrades in?+
Run them in this order: understand your bill, get an energy audit with a blower door test, air seal and insulate, right-size the heat pump and water heater, check electrical capacity, then add solar and storage last. The sequence is cheapest-and-most-foundational first because each step shrinks the next. A tighter shell drops the heating and cooling load, so the heat pump you buy afterward can be a smaller, cheaper unit, and a solar array sized later offsets a realistic future load instead of today's waste. The only exception is a system that has already failed: do the air sealing you can, then size the new equipment for the tighter house you plan to build.
Should I insulate before installing a heat pump?+
Yes, air seal and insulate first so the heat pump is sized for the tighter house. Sizing a unit for a leaky, under-insulated home and insulating afterward leaves it oversized, which raises the upfront price, causes short cycling, and feels less comfortable. A tighter shell lowers the heating and cooling load, so you can buy a smaller, cheaper heat pump that runs longer, steadier cycles. If your system has already failed and you cannot wait, have the installer run a Manual J load calculation against the insulation levels you plan to reach, not the leaky house you have today.
Do I need an energy audit before I start?+
Book one before any major equipment, especially if your utility subsidizes the cost and you intend to act on the findings. The U.S. Department of Energy reports that following an audit's recommendations often cuts energy use by 5 to 30 percent. The blower door test pinpoints where air actually leaks and ranks which combination of fixes returns the most savings per dollar in your specific home, so your first dollars hit the biggest line item instead of a guess. Skipping this step is the classic mistake that leads to an oversized heat pump and still-cold rooms.
How do I budget for energy upgrades and decide what is worth it?+
Set one budget for the next 12 months and a wider range for the next 3 to 5 years, since you will phase projects rather than do them at once. For each project record four numbers: upfront cost after incentives, estimated annual savings, payback in years (cost divided by savings), and your confidence as low, medium, or high. A $1,000 heat pump water heater saving $250 a year pays back in 4 years, while $3,000 of attic work saving $270 takes about 11 years, so rank by your top two goals: faster payback might move the water heater up, comfort and HVAC downsizing keeps insulation first. A $2,000 rebate on a $12,000 system that saves little in your region loses to an undiscounted $3,000 project that pays back in four.
Is there a federal heat pump tax credit in 2026?+
No. The federal 25C heat pump credit applied only to qualifying equipment placed in service on or before December 31, 2025, so a heat pump installed and turned on in 2026 earns nothing from 25C. State and utility rebates are separate programs that may still apply, so check your state energy office. See the dedicated tax credit guide for current 2026 status and how to claim 25C if your unit went in during 2025.
Do I need an electrical panel upgrade for a heat pump or other electrification?+
Not automatically. Many homes add a heat pump, heat pump water heater, or EV charger on existing service using a load calculation, lower-draw equipment, and circuit-sharing devices that let two loads share one breaker. The upgrade is most likely when you have older 100-amp service and plan to add several large loads at once; 200 amps is the typical target for a fully electrified home. Have a licensed electrician run the load calculation before assuming you need it, and if you do, fold the 100-to-200-amp job into the electrification budget instead of meeting it as a surprise on install day.
Where do I start if I just want lower bills and more comfort?+
Pull your last 12 months of gas and electric bills and split them into heating, cooling, water heating, and everything else with a bill breakdown tool, which tells you the biggest line item before you spend a dollar. Next an energy audit confirms where the house leaks, and for most older homes air sealing plus insulation is the highest-leverage first project for both comfort and bills, with payback often in the 3-to-7-year range. If you are unsure, a guided start path routes you by priority: high bills, comfort, or aging equipment each lead to a different first step.
When does solar make sense in the plan?+
Add solar and batteries as the last layer, after the shell is tight and your long-term heating fuel is decided, so you size the array for a realistic future load instead of paying to offset waste you could cut more cheaply. Payback swings from under 10 years in strong markets to several decades in weak ones even with tax credits, driven by your local electricity rate, net metering or export rules, roof age and shading, and upfront cost after incentives. Run those four inputs against your own roof and tariff rather than a national average. Solar can still pay off for resilience or rate hedging when the simple bill payback is long, but list that reason so you know you are buying more than savings.
Try the companion tool
This post links to an interactive tool built for this topic. Open it to see numbers tailored to your home.
Open the toolGet practical energy tips
Join homeowners getting practical tips on cutting energy bills and staying comfortable.
Practical tips only. Unsubscribe anytime.
Read this next
Related guides selected by topic overlap and upgrade path.
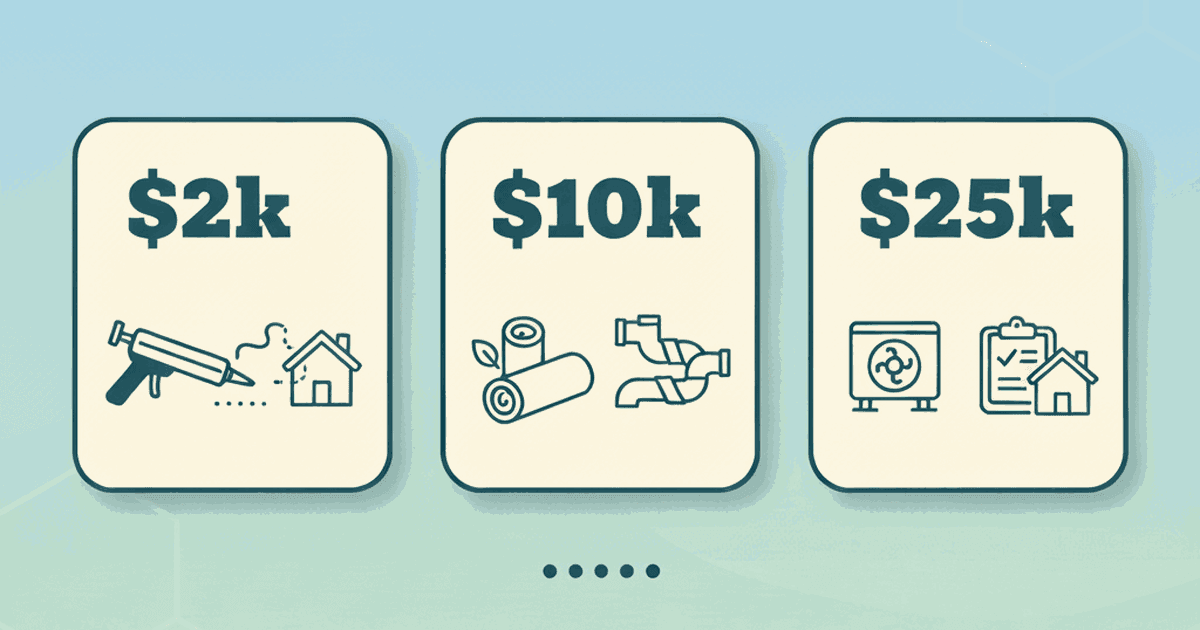
A practical playbook for spending $2k, $10k, or $25k on energy upgrades—based on your bills, comfort issues, and equipment age.
Compare attic insulation, air sealing, and a heat pump using your rates and comfort goals so you spend on what moves the needle.

Tesla Powerwall 3 installed cost in 2026 is about $13,000 to $16,500 all-in (battery, Gateway, labor, permits). The 30% federal credit is gone. Full breakdown.

Attic insulation costs about $1,500 to $3,500 for a typical home, or $1.50 to $4 per sq ft. See 2026 prices by material, attic size, and tax credit.